Get started with Railt
This tutorial helps you:
- Obtain a basic understanding of GraphQL principles.
- Define a GraphQL schema that represents the structure of your data set.
- Run an instance of Railt Application that lets you execute queries against your schema.
This tutorial assumes that you are familiar with the command line and PHP and have installed a recent PHP (v8.1+) version.
Step 1: Create a new project
- From your preferred development directory, create a directory for a new
project and
cdinto it:
mkdir railt-example
cd railt-example
- Initialize a new project with Composer:
composer init
composer require railt/railt dev-master@dev
Your project directory now contains a
composer.jsonfile.
Please note that in case of installation errors related to installing the dev version ("The package is not available in a stable-enough version according to your minimum-stability setting"), you need to specify
"minimum-stability": "dev"incomposer.jsonfile.See more at https://getcomposer.org/doc/04-schema.md#minimum-stability
Applications that run Railt Application may require two top-level dependencies:
-
railt/webonyx-executor- An executor that provides a webonyx/graphql-php bridge for launching and processing GraphQL requests. -
railt/router-extension- A router extension that provides a convenient way to delegate GraphQL requests to controller instances.
Alternatively, you can install all components separately:
composer require railt/factory railt/webonyx-executor railt/router-extension
Step 2: Define your GraphQL schema
Every GraphQL application (including Railt) uses a schema to define the
structure of data that clients can query. In this example, we'll create an
application for querying a collection of users by id and name.
Open index.graphqls in your preferred code editor and paste the following
into it:
# Comments in GraphQL strings (such as this one)
# start with the hash (#) symbol.

# This "User" type defines the queryable fields for
# every user in our data source.
type User {
    id: ID
    name: String
}

# The "Query" type is special: it lists all of the
# available queries that clients can execute, along with
# the return type for each. In this case, the "books"
# query returns an array of zero or more Books (defined above).
type Query {
    users: [User]
}
Now just open (create) the index.php file and paste the following into it:
<?php

require __DIR__ . '/vendor/autoload.php';

//
// Create An Application
//
$application = new Railt\Foundation\Application(
    executor: new Railt\Executor\Webonyx\WebonyxExecutor(),
);

$application->extend(new Railt\Extension\Router\RouterExtension());

//
// Creating a connection instance that will process
// incoming requests and return responses.
//
$connection = $application->connect(
    schema: new \SplFileInfo(__DIR__ . '/index.graphqls'),
);
This snippet defines a simple, valid GraphQL schema. Clients will be able to
execute a query named users, and our server will return an array of zero
or more Users.
Step 2.1: Schema health check
To health check an application, you can create a GraphQLRequest instance
manually by passing the request object with the desired GraphQL query string.
//
// Passing a request to the specified connection.
//
$response = $connection->handle(
    request: new \Railt\Http\GraphQLRequest(
        query: '{ users { id, name } }',
    ),
);

dump($response->toArray());

//
// Expected Output:
//
// array:1 [
//   "data" => array:1 [
//     "users" => []
//   ]
// ]
//
Step 3: Define controller
Resolvers tell Railt Application how to fetch the data associated with a
particular type. Because our User array is hardcoded, the corresponding
resolver is straightforward.
Create a controller file with a UserController class, for example with
a index() method and the following code:
<?php

class UserController
{
    public function index(): iterable
    {
        return [
            ['id' => 1, 'name' => 'Vasya'],
            ['id' => 2, 'name' => 'Petya'],
        ];
    }
}
Make sure that this class is available for autoloading or the file is included in the
index.php.
Step 4: Bind field to controller action
We've defined our data set, but Railt application doesn't know that it should use that data set when it's executing a query. To fix this, we create a route.
Route tell Railt how to fetch the data associated with a particular type.
Because our User array is hardcoded, the corresponding route is
straightforward.
Add the following @route directive to the bottom of your index.graphqls file:
# ...
type User {
    id: ID
    name: String
}

# ...
type Query {
    users: [User]
        @route(action: "UserController->index")
}
Step 5: Working with HTTP
To pass the request data and send the response, we must complete
our index.php file.
In the case that you use Symfony, Laravel or another http layer (for example, psr-7), then you can organize data acquisition according to the provided framework API and/or specification.
$data = json_decode(file_get_contents('php://input'), true);

$response = $connection->handle(
    request: new \Railt\Http\GraphQLRequest(
        query: $data['query'] ?? '',
        variables: $data['variables'] ?? [],
        operationName: $data['operationName'] ?? null,
    ),
);

$json = json_encode($response->toArray());

header('Content-Type: application/json');
header('Access-Control-Allow-Origin: *');

echo $json;
Step 6: Start the server
We're ready to start our server! Run the following command from your project's root directory:
php -S 127.0.0.0:80
You should now see the following output at the bottom of your terminal:
PHP 8.2.6 Development Server (http://127.0.0.1:80) started
We're up and running!
Step 7: Execute your first query
We can now execute GraphQL queries on our server. To execute our first query, we can use Apollo Sandbox, GraphQL Playground or something else.
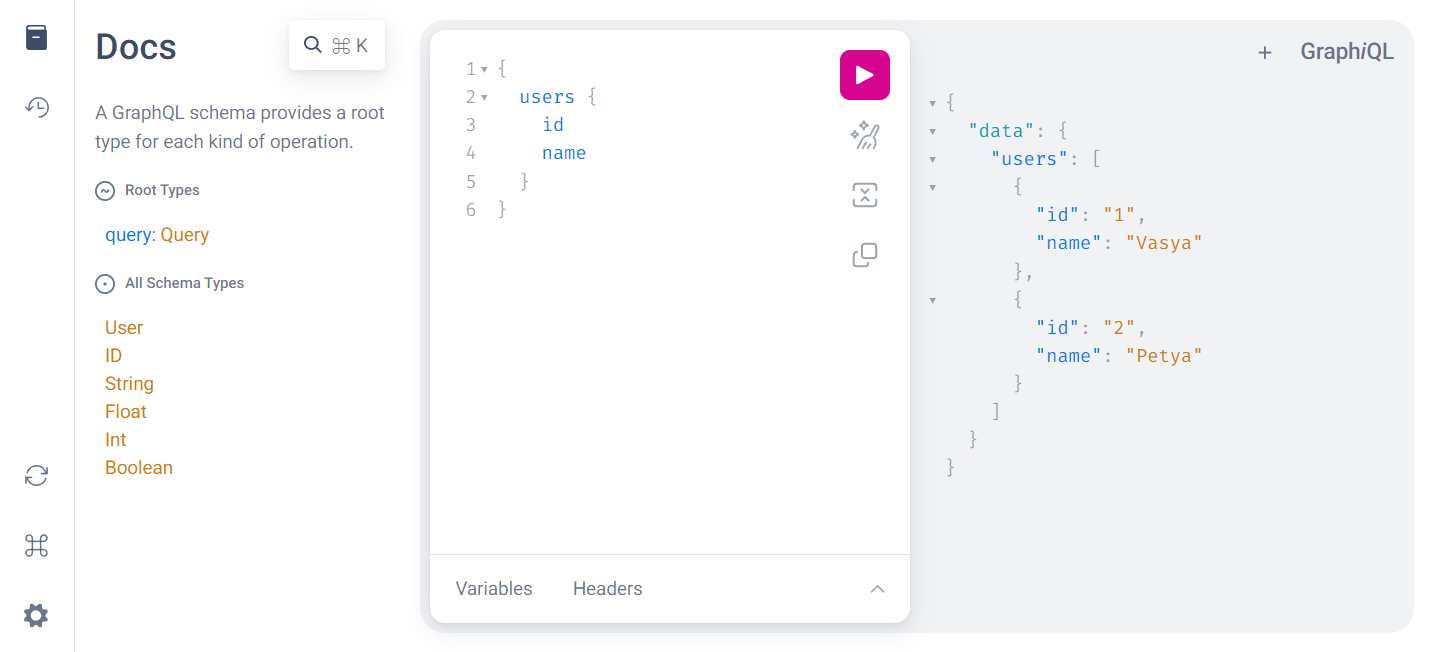
Our server supports a single query named users. Let's execute it!
Here's a GraphQL query string for executing the users query:
{
  users {
    id
    name
  }
}
Paste this string into the query panel and click the "send request" button (The GraphQL interface and panel layout may depend on the platform/client you are using). The results (from our hardcoded data set) appear in the response panel:

One of the most important concepts of GraphQL is that clients can choose to query only for the fields they need. Delete
namefrom the query string and execute it again. The response updates to include only theidfield for eachUser!